Sunday, 11 July 2010
Bathroom: floor
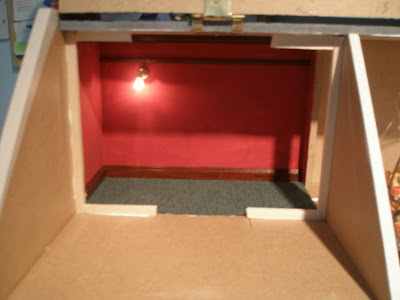
It is less risky to fit paper to the bathroom floor then use that as a template for your flooring, as I've done here:
Saturday, 10 July 2010
Bathroom: false passageway and decoration
This house has a big bathroom. Correction: this house had a big bathroom. A trial run with the furniture showed a great waste of space, and frankly I was having difficulty wondering what to do with it.
I've resolved this by building a false wall, giving the impression that you would walk out of the bedroom, though a passageway, to the bathroom. It's not perfect but it works.
I made a frame first to support the false wall, and painted the passageway, adding wood fixtures and a light.
In the bathroom, I've used the same tile paper as for the inside of the kitchen cupboard, stuck on with PVA. The panelled wood is etched balsa, and the picture rail nicely tops this off. I've added skirting board and a little cornicing. White paint is too stark, a light cream works much better.
Flooring, lighting and furniture is needed now. I'll also add some items in the passageway.
Living room: woodwork
I've mitre cut the picture rail, cornice and skirting board, stained it in mahogany and fitted it. Working around the fireplace was very fiddly.
This room is ready now for filling with furniture, rugs and ornaments.
Subscribe to:
Posts (Atom)


